VFX Supervisor Tristan Zerafa talks about Pixomondo’s environment and crowd work for the show’s final episode, a VES Award nominee, from dramatic interiors to a never-ending forest.
Pixomondo's work on the Apple TV+ series ‘See’ Season 2 for the final Episode 8, has been nominated for a VES Award by the Visual Effects Society for Outstanding Supporting Visual Effects in a Photoreal Episode. Pixomondo's VFX Supervisor Tristan Zerafa, among the nominees, spoke to Digital Media World about the digital environment and detailed crowd work required for the episode.
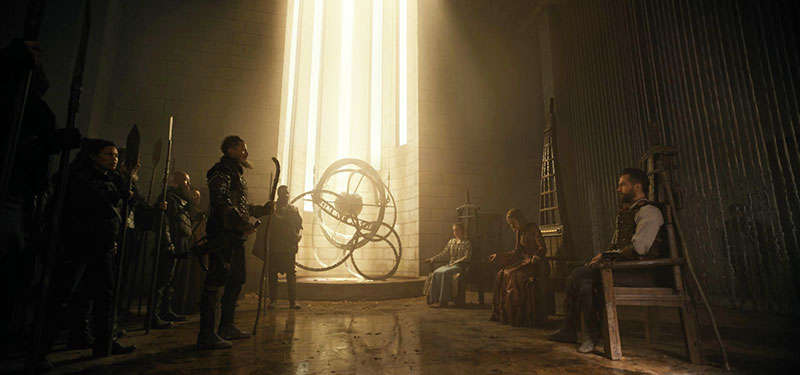
Pixomondo’s brief for their main sequence was to define the Council Room of Pennsa, an important place in the narrative of the story. The team’s scope of work involved raising the location’s fairly low, practical ceiling, a section of which had a solarium roof, and extending the length of the room, creating elements, structure and lighting to give it an overall majestic atmosphere.
{media id=176,layout=solo}
Raising the Roof
The shoot location was a lecture hall at Pennsylvania State University. The artists started by gathering the Set Design artwork and schematics for the practical set, and took LIDAR scans as well, giving them the same foundation as the lecture hall. The higher ceiling and set extensions were built in Maya, using procedural modelling for textures and shading, and rendered in Arnold.
The lighting created a special challenge due to the changes that giving the room a higher ceiling would bring. Tristan said, “The low-lying practical set occluded a lot of light, while raising the roof would have flooded the room with more light, with the sun as a light source. We would often tone down that flood to complement the parts of the plate we were keeping as they were, while maintaining the original lighting cues defined by the director of photography Michael Snyman. For instance, the DP would sometimes spotlight the principle actors or use backlighting to create a silhouette."
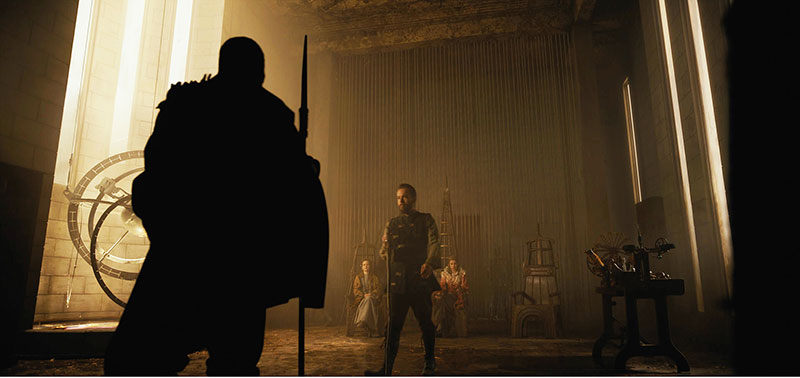
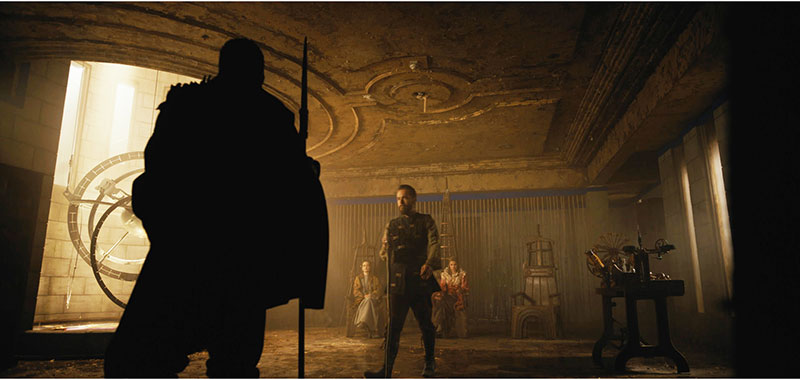
The DP also favoured generating atmospherics like smoke, dust and fog on set to capture in-camera. The VFX team could then use these looks as inspiration for simulations created in compositing, using Nuke.
Creating an Audience
Complexities emerged in other episodes when the production decided an audience should be present in the Council Room, adding to their scope of work. A fairly substantial crowd was called for to fill the room, without over crowding it, ranged along ten rows of seating.
“To manage this, the series overall VFX Supervisor Chris Wright organised a follow-up element shoot after the edit was locked to make sure we shot only what was needed for the sequence but would still have enough people in our shots. Since Chris and I have worked together a few times before over the last couple of years, he tasked me with executing this particular shoot – there were two film units shooting that day and the VFX unit would also be split.
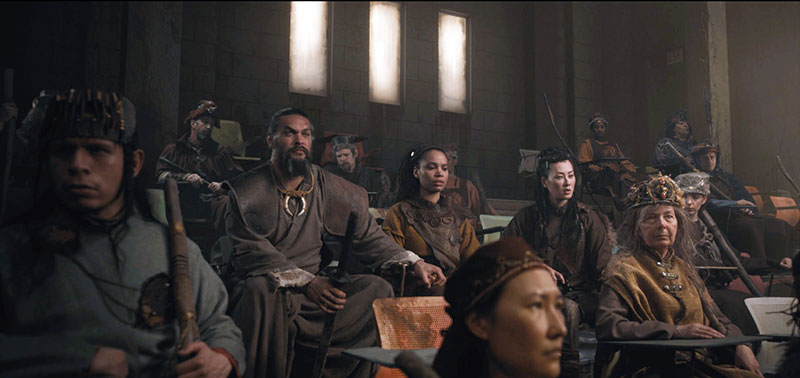
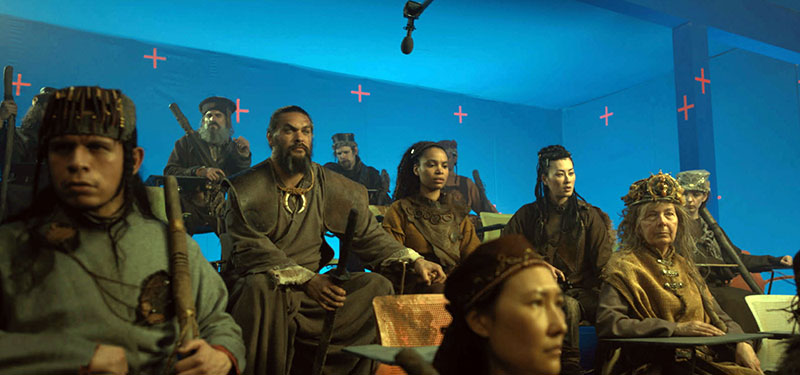
“We prevized the layout of a crowd consisting of 42 people. The problem was that we only had access to ten actors on the day, compounded by the fact that we only had three practical rows of seating to work with, although the set design required ten. That’s a lot of unaccounted for people, combined with inadequate height and perspective in the set to accommodate them.”
Crowd Continuity
The job would take some manoeuvring but for Tristan, crowd continuity was a priority, aiming to avoid capturing the same person in consecutive shots. “Relying on the close up shots from the locked edit depicting the main talent served as an anchor. From those close-ups, we devised previz. This featured a colour-coded numbering system to differentiate the main actors from the extras, and their seated positions respectively, on each of the fictional ten rows, while also tracking which side of the room each actor was on,” Tristan said.
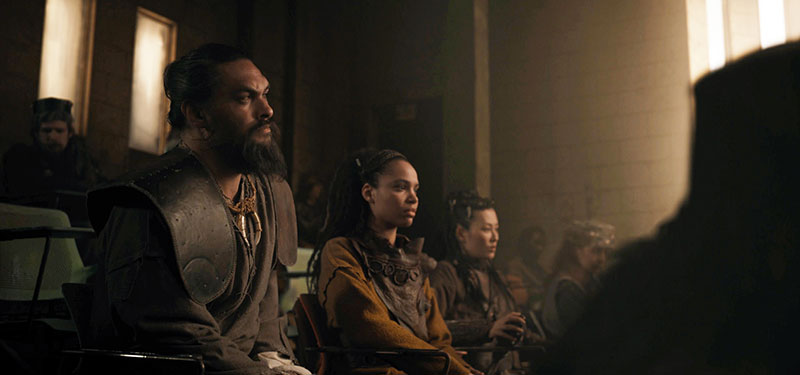
This meant he needed to break out each row, and bake in the extras that would appear in the principle actors’ shots. “We planned four wardrobe changes for each extra, then defined camera positions for the crowd elements used to extend the crowd in each of our hero closeup shots, while avoiding duplicates in-frame and in the sequence,” he said.
"We finished up the day by shooting a generic crowd tile for the wider shots. A crowd simulation using this tile was created, and then a crowd network in Nuke, arranged in a 2.5D template. The kind of camera work the production used here, ranging from super wide shots to tight close-ups, meant we needed to use real photography. A digitally generated crowd wouldn’t scale well enough.
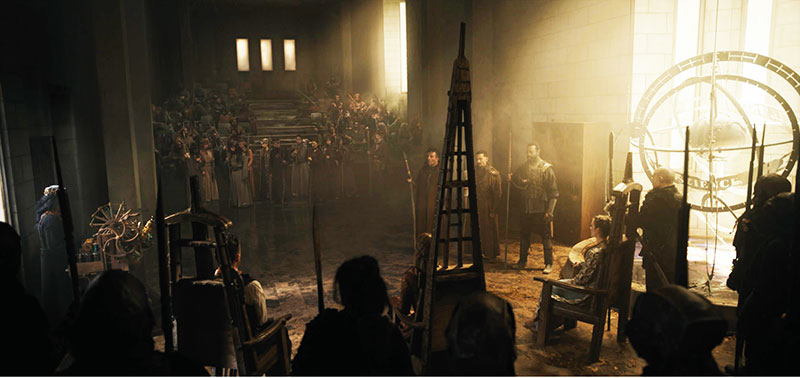
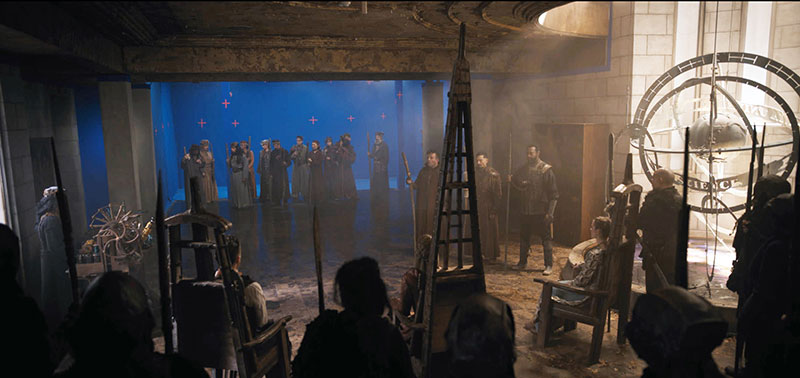
“On paper, I had calculated that on the day we would need a 12 hour shoot, but in reality we only had four hours to record what we needed. It was time to get to work, so – at the risk of appearing a little crazy to the second unit crew – I proposed the action plan. Every department bought into our plan and executed it flawlessly for us. We couldn’t be more pleased with the results and what we achieved.”
Going back to the lighting, the more challenging side of the room was the side where the audience was sitting. The actors sat within a sea of blue screen with no real plate reference, which was simultaneously both liberating and challenging for the artists in post. For guidance, they locked down the luminance and shadows in the wide shots and applied those settings to the close ups, although each shot required its own adjustment, within reason, to complement the plate.
Never-Ending Forest
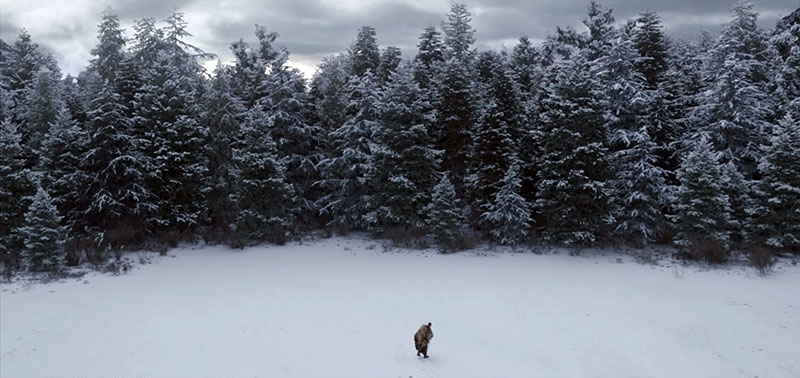
After so much intensely planned crowd work, the season’s finale shot made a striking change of scenery. “This was a big moment for lead character Baba,” Tristan said. “As he departs from his family across the vast snowy landscape, we needed to describe the scene in tones of sorrow and isolation, while leaving the audience and the season with a sense of hope.
“The actor was shot on a snowy outdoor set against blue screen, while the creative brief was to surround him in an expansive, snow covered landscape and create a never-ending forest extending into the distance to look somewhat mythical in scope and scale, but still rooted in reality in its detail. In the case of this forest, we used Houdini to scatter 4 million digital trees back toward the horizon, creating 15 different varieties of coniferous and deciduous species to achieve the required look. We also used Houdini to apply snow to the huge numbers of needles on the trees.”
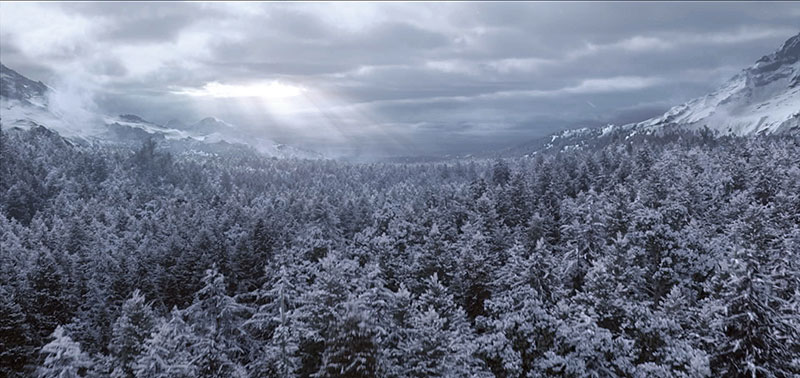
“We designed a brutal weather system, interrupted by a pocket of godrays cutting through the clouds and focused on the horizon ahead. The mountains in the shot are built in CG, and the very distant background as well as the beautiful sky are digital matte paintings. However, the camera move – a drone shot pulling way up overhead above the character – made it impossible to use a matte painting for the mountains or anything closer to camera.” www.pixomondo.com
Winners of the VES Awards will be announced in March 2022.


