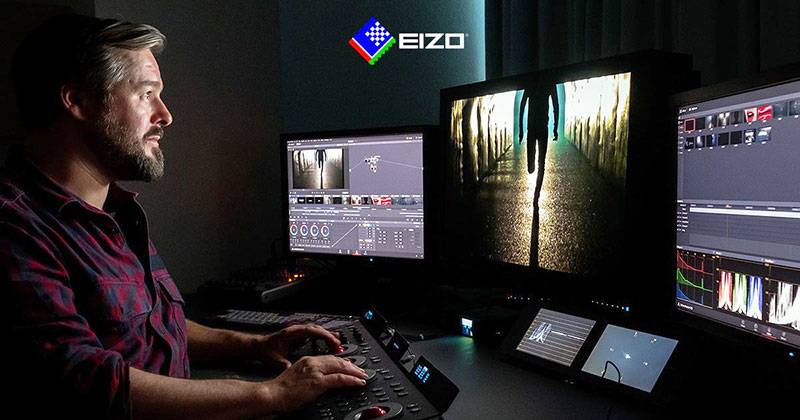
Colourist Tashi Trieu combined his understanding of VFX, motion picture imaging, colour science and digital post workflows with grading skills to give the new Avatar film its special look
![]()
Colourist Tashi Trieu has worked in post production for more than 10 years, meanwhile gaining a diverse background in compositing, colour and digital and film photography. Now, with an understanding of story-centric visual aesthetics, he is able to combine his technical and artistic skills to refine the looks of movies and television productions, commercials and other short form projects.
He believes that today, colourists need a detailed understanding of VFX, motion picture imaging, colour science and the digital post workflow to produce creative results effectively. His other work includes on-set consulting, contributing to ACES and teaching digital intermediate colour grading and finishing to university students.
Tashi has worked with James Cameron's Lightstorm Entertainment for several years as a Digital Intermediate (DI) editor, including the remaster of ‘Terminator 2’ and ‘Alita: Battle Angel’. Most recently, for ‘Avatar: The Way of Water’, he moved up to colourist, working directly with Director Cameron.
Stereo Tests and Look Development
In 2019, he was involved during pre production in various ways, looking at early stereo tests with the DP Russell Carpenter. The tests were very precise and focussed on specific features of the stereo image. “Polarised reflections are a real challenge in stereo as they result in different brightness levels and textures between the eyes that can degrade the stereo effect,” Tashi said. “I remember doing tests on multiple swatches of black paint to find the one that retained the least amount of polarisation. I had never been a part of such detailed camera testing before.”
![]()
The look development was done mainly at WetaFX. As principal VFX vendor on the project, their work is embedded in every frame, from live action capture through full CG shots. Tashi said, “Their approach left a lot of creative latitude for us in the DI. Our show LUT is an elegantly simple S curve using a straightforward gamut mapping from SGamut3.Cine to P3D65. This gave plenty of flexibility to push moments of the film more pastel, for instance, or into an absolutely photorealistic rendition.
“Naturally, a lot of this movie takes place underwater. One of our priorities was maintaining photorealism through huge volumes of water. That means grading volume density to convey a sense of scale. Close ups can be clear, high contrast and vividly saturated, but as you increase distance from a subject, even in the clearest water, the spectrum fades away to blue. This was something we could dial in quickly and interactively in the DI. Any time we needed to convey depth, we'd add more blue and subtract red and green.”
Customising Conform and Editorial
He worked on this project in Blackmagic Design DaVinci Resolve Studio. Owing to his background as a DI editor, he stays hands on throughout the conform and editorial process, which affected the portions of the software he was using at different stages. He said, “I spent almost as much time on the Edit page as I did in Color. I didn’t go into Fusion on this job, but that’s mostly due to the improvements in the ResolveFX toolset.
“Almost everything I needed to do beyond the grade could be done with those tools right on the Color page. This was an advantage because those grades were easy to replicate with Color Trace and propagate across multiple simultaneous grades for different aspect ratios and light levels.” Color Trace copies colour corrections from one timeline to another, shot-by-shot, either manually or as an automated process.
![]()
Tashi said he likes to keep things simple by automating what he can, and made heavy use of the Resolve Python API on this project. “I wrote a system for indexing VFX deliveries once they arrived at the DI that my DI Editor, Tim Willis from Park Road Post, and I could use to very quickly load up the latest versions of shots,” he said. “I could take an EDL of what I currently had in the cut and in seconds have an update layer of all the latest shots. This meant we could make our final stereo reviews in scene context.”
Eleven Timelines
Color Trace, described above, was one of Resolve’s most critical tools for Tashi on this film due to the project’s many theatrical picture deliverables. Each reel of the film was contained in its own Resolve project, each ultimately containing 11 unique timelines – one for each of the deliverables. The DI editor Tim Willis kept those editorially identical across cut changes and VFX updates.
Tashi said, “When we’d lock a grade in one format, I’d Color Trace those grades to other formats and trim those further. If we made changes to framing and composition in one, I could ripple those changes back through the other formats without overwriting the grading decisions. It’s simple, but the amount of time saved and the elegance of that sort of workflow is what kept us from working too many late nights.”
Hardware Balance
This film was doubly challenging, not only because of the stereo, but also because they were working at a high frame rate of 48fps. Even on a new workstation built with four A6000 GPUs, real time performance was difficult to guarantee. “We had to maintain a delicate balance between what’s sustainable over the SAN’s bandwidth and what’s gentle enough for the system to decode quickly. Every shot was delivered as OpenEXR frames with as many as five or six layers of mattes for me to use in the grade,” Tashi noted.
![]()
“Technical Director Ian Bidgood at Park Road Post had a really clever idea to have WetaFX write the RGB layer as uncompressed data, but ZIP compress the mattes within the same file. This meant we had rock solid playback performance, really fast rendering for deliverables, and the file sizes were barely more than if they didn’t contain the mattes.”
From HDR to SDR – and Back
The post team had the unusual luxury of working in Dolby Vision 3D from the start. The brightest, highest quality deliverable, or ‘hero grade’, was the Dolby 3D version at 14fL in extended dynamic range. “This is a great way to work because you can see everything so well. This is critical in stereo reviews where you need to see if the compositing is working correctly or if there are tweaks to be made,” said Tashi. Foot-lamberts, or fL, are the unit of measure cinematic productions use to specify how much light should be reflected off the cinema screen in a 1ft x 1ft area.
“Once you grade for Dolby Vision, standard digital cinema 2D at 14fL is a relatively simple transformation, with some custom trims. You lose your deep blacks with a traditional DLP projector, but it’s just as bright as Dolby 3D,” he said.
“However, one of the biggest challenges was creating the 3.5fL grade that, unfortunately, is the standard for most commercial 3D digital cinemas out there. It’s an exacting process to create the illusion of contrast and saturation with so little light. We have to make certain decisions and allow background highlights to roll off early in order to preserve contrast in high dynamic range scenes, like day exteriors. Night scenes are much more forgiving.”
![]()
Generational Leap
An especially memorable scene for Tashi, a massive gathering of the Sully family with the Metkayina clan, takes place during a rainstorm. “It’s an absolutely gorgeous scene that evokes Rembrandt,” he said. “The cold, overcast skies wrap around the characters and a subtle warm accent light gives the scene a really nice dynamic.
“It’s incredible how absolutely real everyone looks. You have to actively remind yourself that everything in this shot is artist generated. None of it, beyond the actors’ performances, is actually ‘real’. It’s truly a generational leap in visual effects artistry and technology, and the results are extraordinary.” www.blackmagicdesign.com


