Adobe has integrated Frame.io’s video collaboration tools into Creative Cloud, and released further updates to After Effects and Premiere Pro including native M1 support for After Effects.
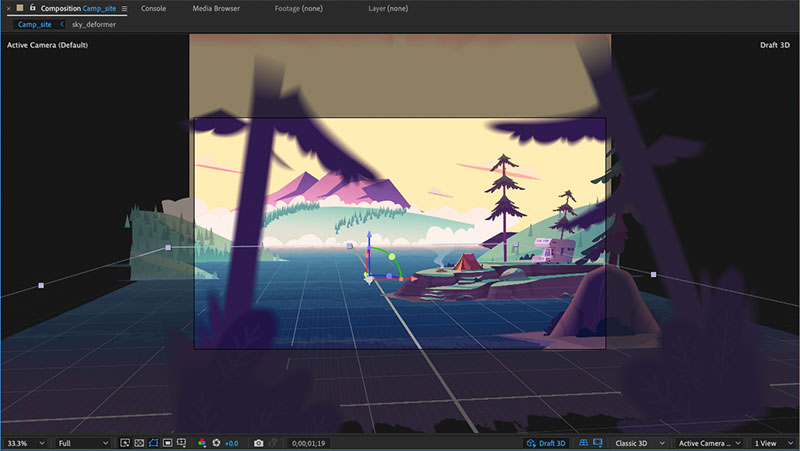
Extended Viewer, After Affects
Adobe has integrated Frame.io’s video collaboration platform into Creative Cloud applications, and released further updates to After Effects and Premiere Pro including native M1 support for After Effects.
Integrated Review and Approval
Following the company’s purchase of Frame.io in 2021, Adobe is launching Frame.io for Creative Cloud, which sets out an integrated review and approval workflow for post-production video editors and producers, agencies and clients. These project stakeholders can all collaborate in the cloud while the editor stays in the working app, making it especially useful as part of remote teamwork. It removes steps from the standard review-and-approval process, and arrives at final approval faster.
As part of a Creative Cloud subscription, video creators can share work in progress with an unlimited number of reviewers in different locations, and have a fast upload and download service to the Frame.io cloud with 100GB of shared storage to set up cloud media sharing. Users can work on up to five projects at once with an umlimited numer of reviewers. While the reviewers watch, draw on frames and make written comments, Frame.io keeps track of the timecode and collects all feedback in one place.
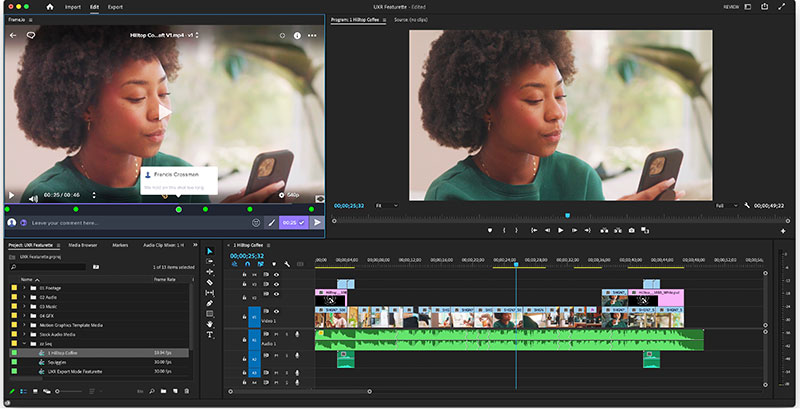
Frame.io review comments
The comments and sketches appear in the editor’s review panel inside Premiere Pro. After Effects users log in to Frame.io to access review and approval tools within the new After Effects Review workspace, and then share work in progress and receive feedback without leaving their compositions.
Included with Frame.io for Creative Cloud is the Camera to Cloud workflow that sends camera files directly to Premiere Pro so that editorial can begin while production is happening. Camera to Cloud uploads via Teradek, Atomos and Filmic Pro, and works with regular RED, ARRI, Panavision or Sony professional cameras, audio recorders and production gear currently in use. Images are sent from the cameras to a Teradek CUBE, while sound recorders upload directly to Frame.io. Camera to Cloud can also connect with software such as Pomfort Livegrade and ShotHub, ZoeLog, Magic ViewFinder and Colorfront.
A new series of updates to Adobe After Effects and Premiere Pro is available now.
More Speed and Control in After Effects
Native M1 support now launches apps several times faster and renders After Effects compositions twice as fast on M1 Macs compared to an Intel 10-core iMac Pro. Access to this new hardware means motion designers can now expect to be able to iterate their work faster.
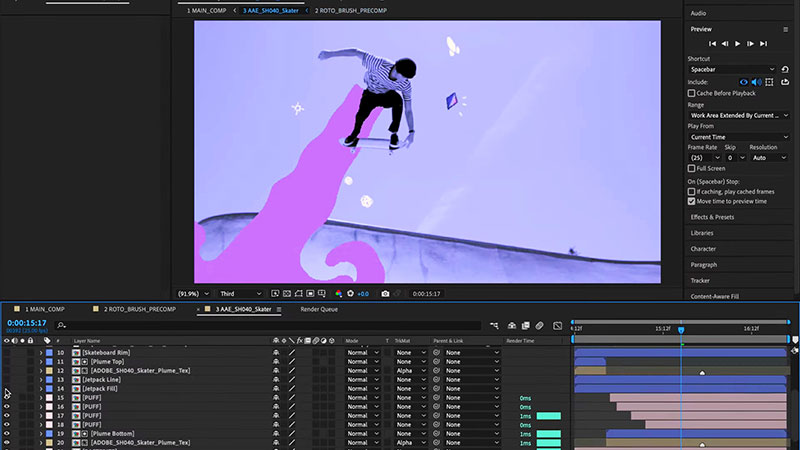
Apple M1 support
With Extended Viewer, users can view 2D and 3D layers located outside a frame’s edge when using the Draft 3D engine. You can see what your off-camera 3D content contains and bring it into the scene, navigate 3D space and move 3D layers more easily. It’s also possible to hide or dim the area beyond the frame to visualise the final shot.
Because determining the original edit points in a video is necessary before starting to re-edit, Scene Edit Detection was developed. Using Adobe’s AI engine Sensei, it automatically detects scene changes in an edited clip and creates markers at edit points or splits scenes into individual layers for faster project setup. Users can automatically find the cut points without having to go through the footage manually.
Binning Indicators for 3D Layers show the 3D layers that render together in the same 3D space, which allows them to intersect and cast shadows on each other. When a composite contains both 2D and 3D layers, their order in the layer stack is important – contiguous 3D layers render together in the same 3D space before being composited with 2D layers. 3D binning indicators give you a visual map of how After Effects composites 2D and 3D layers together. An outline around the 3D icons indicates which layers are in the same 3D bin and therefore, need to render together.
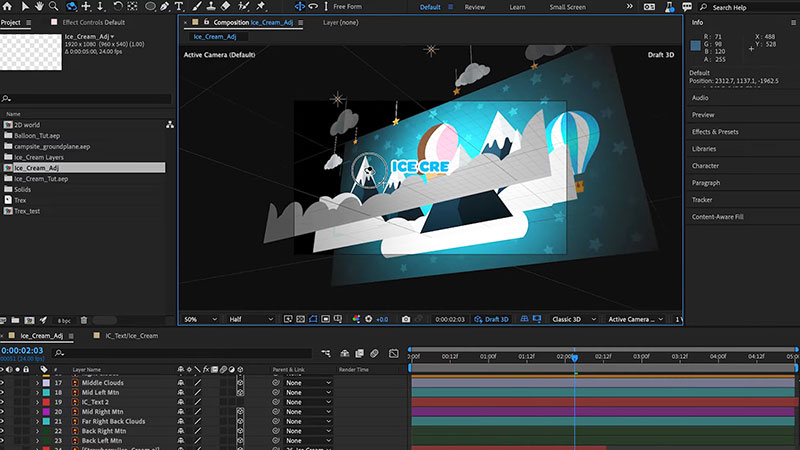
Working with 3D in After Effects
More Visual in Premiere Pro
Adobe Premiere Pro’s core workflow tools – import, header bar and export – are now redesigned to make them more visual for users. For example, instead of relying on project settings, import focuses on the media. As a faster approach for professionals and a simpler method for new users getting started, editors scan and scrub files to assemble their media from different locations. As files and folders are selected they are added to the tray, visualising the storyline. Once you click Create, Premiere Pro brings the media onto the timeline as a new editable sequence.
Navigation via the Header Bar is more centralised for speed and ease of use, with a left-to-right flow. Users can switch between the core tasks of import, editing and exporting. The project name and save status are shown in the centre of the header bar. Via the new dropdown menu, workspaces and how they are displayed in the header bar can be customised.
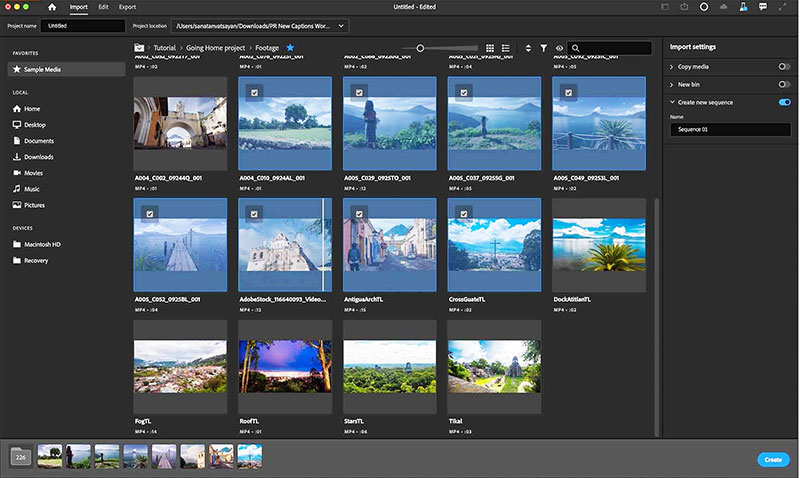
Select media for import
Export is now done by uploading media directly to various destinations like YouTube, Facebook and Twitter. Presets are included that take over encoding processes and preparing files for delivery. You can also orchestrate all of your exports with a one-to-many layout, and deliver them to their destinations in one process, including exporting to a local drive, social media platforms and FTP sites. As each destination is toggled on, Premiere Pro presents recommended settings for each one. If you render as you work, re-rendering at export time is unnecessary, making export faster.
Quick Export, accessible from the Header Bar, now includes the new Preset Manager, which quickly exports to any available format without leaving the current editing workspace. You can modify existing export settings as presets, and import presets from or export them to other machines or colleagues.
Auto Color
Auto Color, a tool that was introduced as Auto Tone in Premiere Pro public beta in 2021, uses Adobe’s AI engine to generate first-pass colour corrections, and also serves as a guide to help new artists become familiar with colour adjustments. Frame sampling is applied to optimise colour across the whole clip, and adjustments are reflected in Basic Correction sliders at the top of the Lumetri panel. The new Intensity slider affects the overall impact, and individual sliders fine-tune the colour and light values.
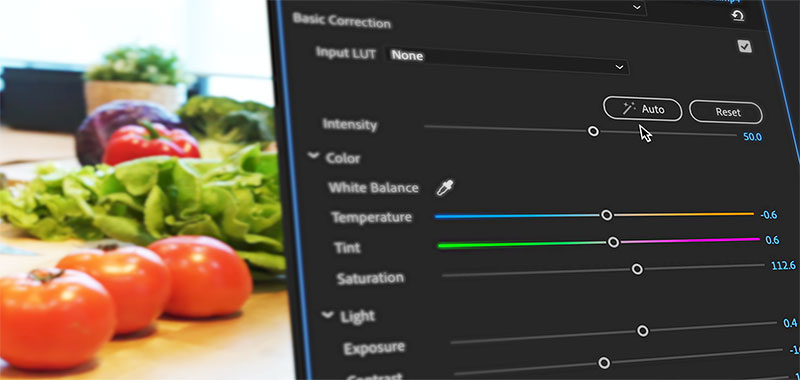
Auto Color sliders
More generally, Auto Color is meant to speed up initial colour correction before moving on to secondary colour tasks, such as skin tone or sky adjustments. It works on source footage, including LOG footage and footage with LUTs applied.
Premiere Pro editors can now show and hide markers by colour – clicking the colour boxes hides unchecked marker colours across the whole application -- and use a Remix analysis progress indicator for audio clips. It is also now possible to start looping playback at the playhead rather than the closest edit point, which may be preferred when the nearest edit point is not related to what you are currently looking at.
Visitors to the 2022 NAB Show can get a closer look at the new features and hear from industry experts at the Adobe and Frame.io booths in the Las Vegas Convention Centre and at partner booths, 23-27 April 2022. www.adobe.com


